Recordings • 1 min read
How to Upload a Recording in Twilanswer
Upload an audio file for greetings and routes: add a recording, name it, pick a file from your computer, then review playback and save.
Steps to upload a recording
-
Open Recordings
- From the Twilanswer dashboard, choose Recordings in the sidebar.
-
Start adding a recording
- Click Add recording (or Add Recording).

- Name the recording
- Enter a name that reminds you what the clip is for (e.g. voicemail greeting, daytime voicemail, after-hours message, or call greeting). This label is only for your team; callers hear the audio, not the name.
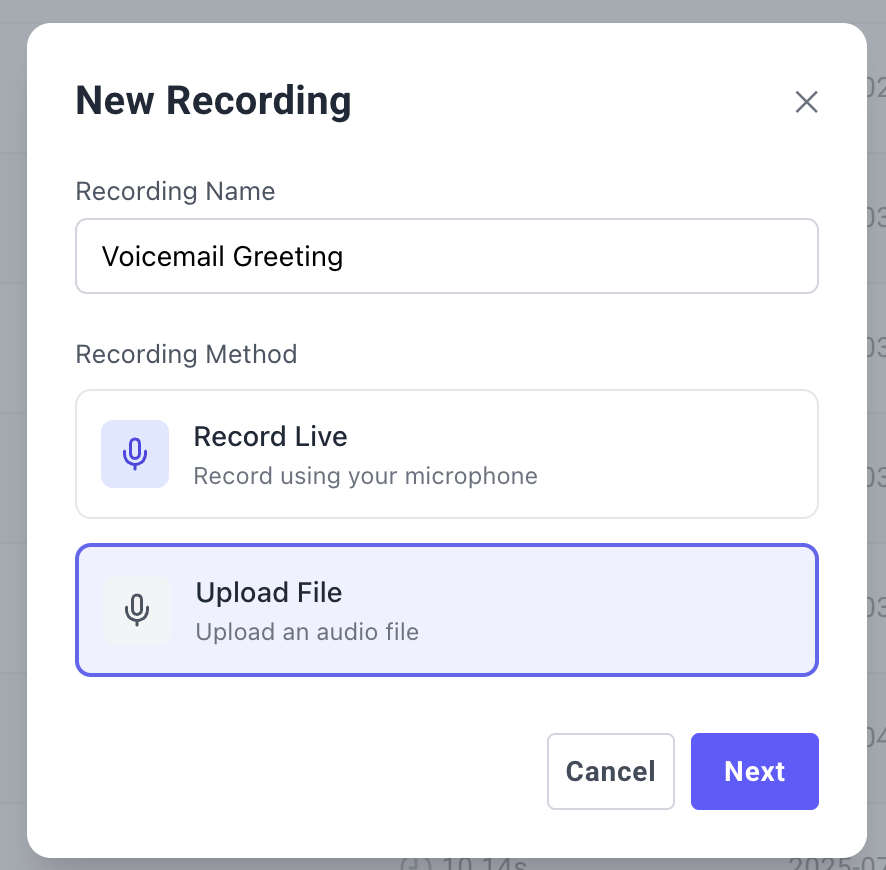
- Choose upload and select your file
- Choose the option to upload an audio file from your computer (for example Upload or Upload file—wording may vary).
- Click Next when prompted.
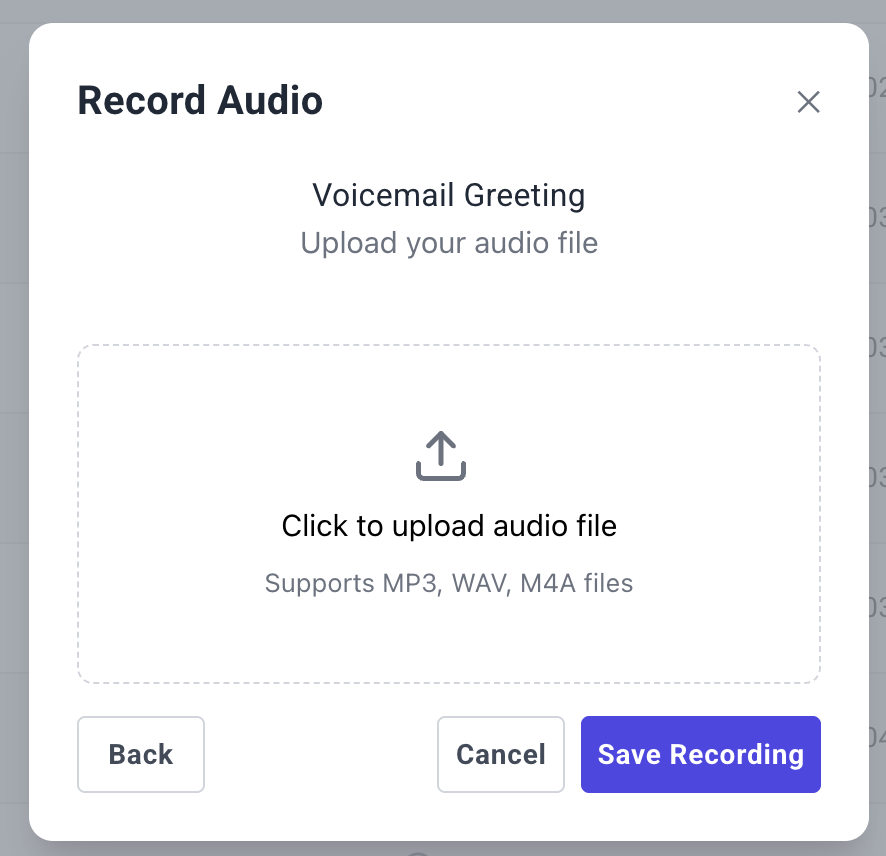
- Select an audio file from your device. Files must be under 25MB; MP3 is typical for uploads.
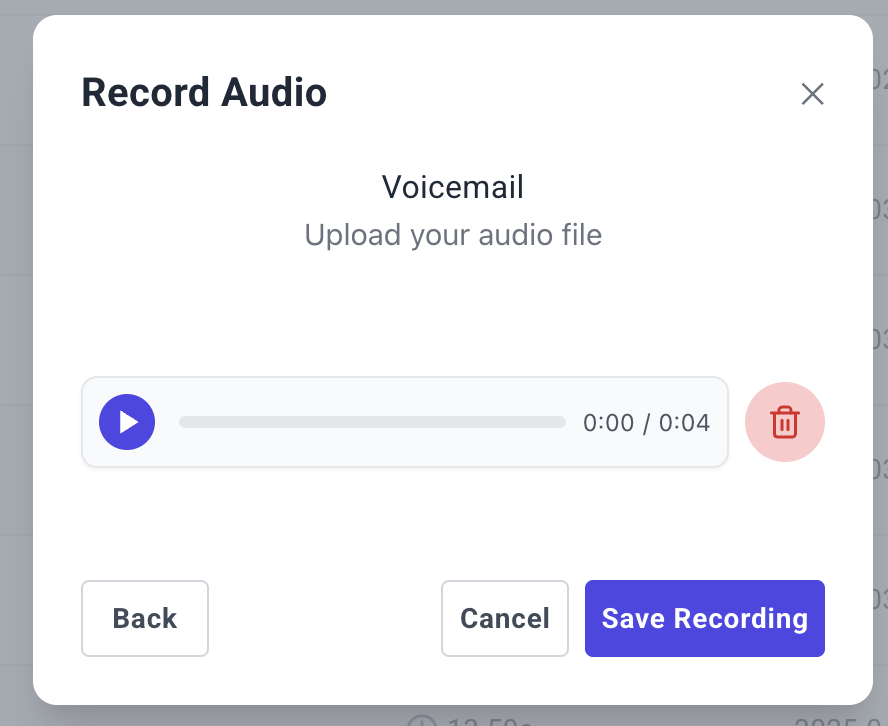
- Review and save
- Twilanswer will show playback so you can confirm the clip sounds right.
- Delete or start over if you picked the wrong file, or save to add it to your recordings list.
Using the recording in call routes
Now that your recording is saved, you can use it in call routes. See How to Configure Call Routes for more details.
Important notes about recordings
- There is no limit on how many recordings you may have, but Twilanswer may remove unused recordings if storage becomes an issue. We will make our best effort to contact you before any deletions.
- Recordings are stored in a publicly accessible fashion to be played for inbound callers. Do not upload any sensitive information.